How to make an animated GIF in Photoshop: step by step guide!
A moving picture in GIF format, consists of a series of frames which displays an animated sequence that loops over & over again. GIF files are commonly used on the web to display graphics and logos as they are a great way to grab your audience’s attention. Not only informative, they are fun compared to a simple jpeg.
Follow this step by step guide to learn how to turn a series of photgraphs into a looping animated GIF using Photoshop!
Step 1: Importing a series of photographs
This technique works well with using photographs taken on a professional camera or even a mobile! In this case I have used photographs taken on a mobile device, capturing various angles of the object to create a smooth running animation.
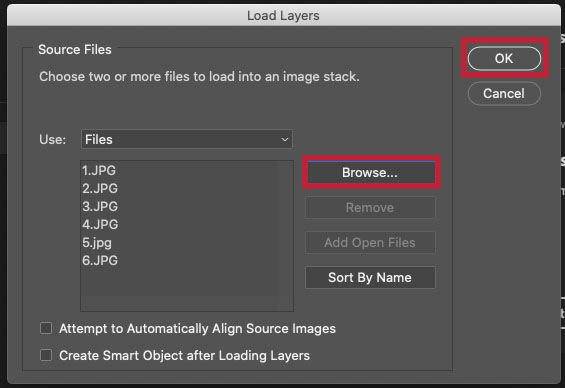
Firstly, open photoshop and go to File > Scripts > Load Files into Stack.
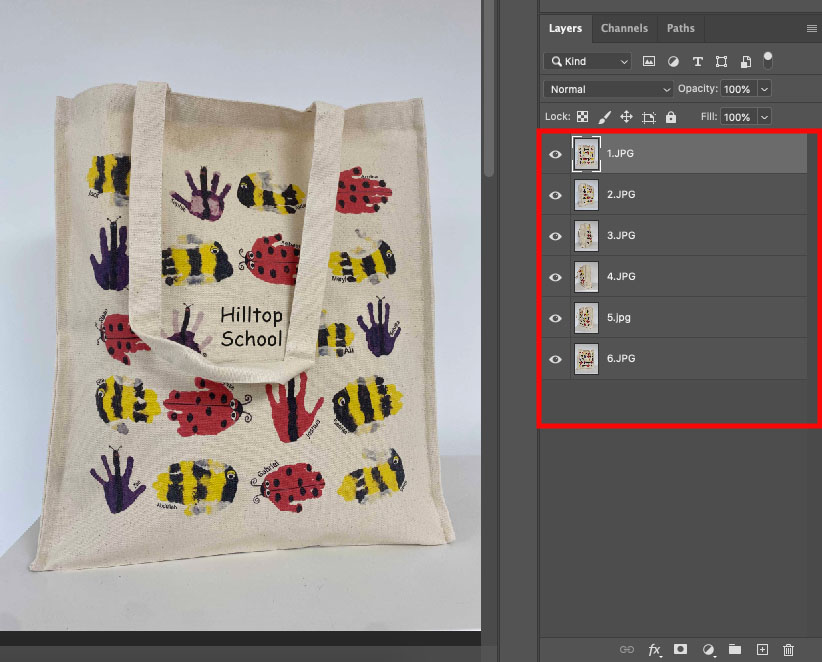
Click ‘Browse’ and import your files whilst holding down the shift key to select them all. Click ‘Open’, followed by ‘Ok’ to import the files into a single layered file.
These individual layers will become the frames of the animation!

Step 2: Using the Timeline Panel
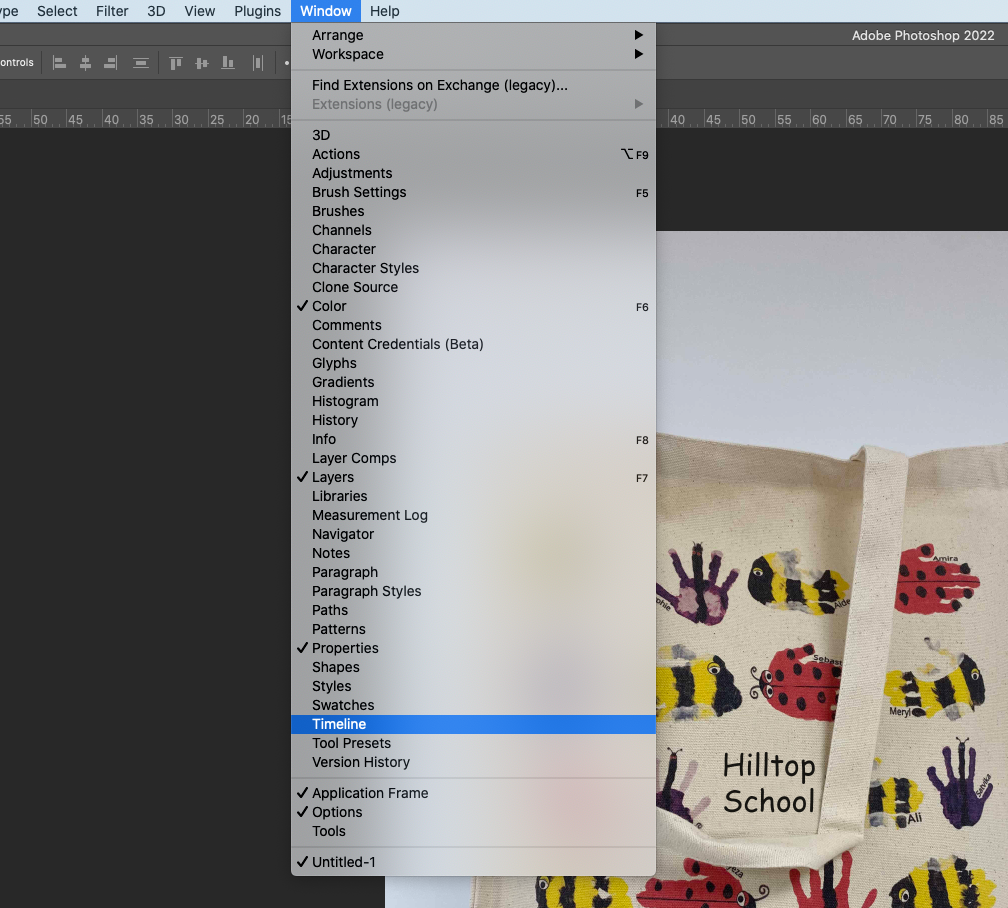
Now you have your individual layers, go to Window > Timeline to open the Timeline panel.
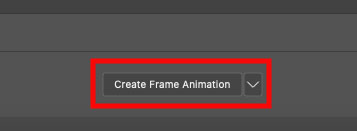
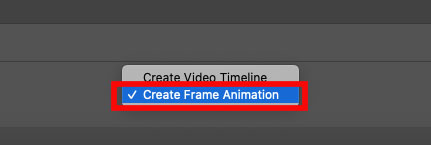
The Timeline panel will open up at the bottom of your screen. Next click the drop down arrow on the button in the middle of the panel and select ‘Create Frame Animation’ then click the button to create a new frame animation.
Step 3: Make animation frames from layers
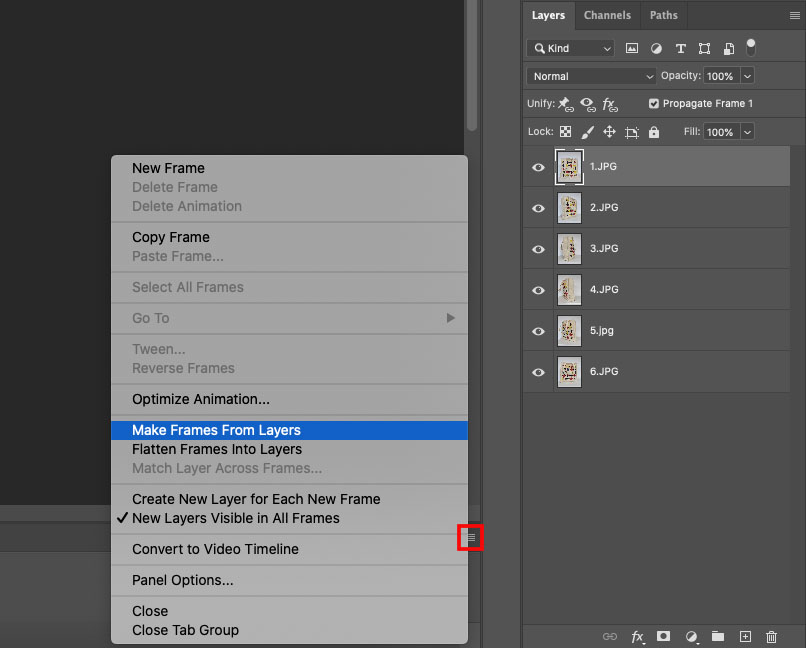
In the top right hand corner of the Timeline panel, click the menu icon followed by ‘Make Frames From Layers’.
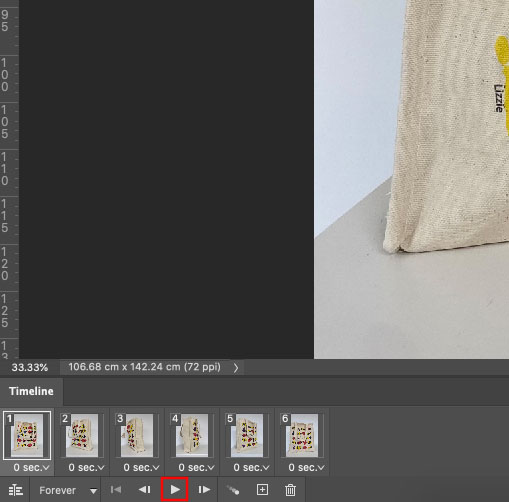
This will convert all your layers into individual frames for your animation. Click the Play button at the bottom of the Timeline panel to preview your animation.
Step 4: Setting the animation to loop
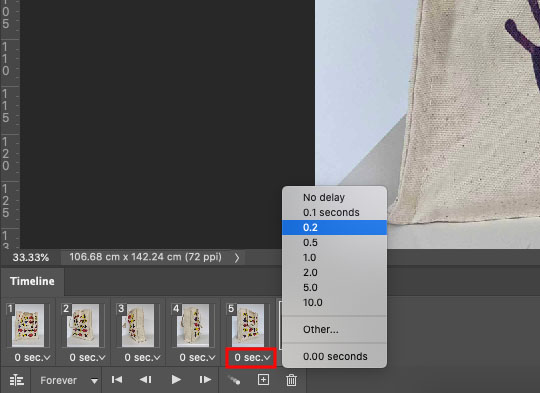
You can edit the pace of your animation by clicking where it says ‘0 sec’ and select your desired speed. Here I have chosen 0.2 secs just to make sure the animation runs smoothly.
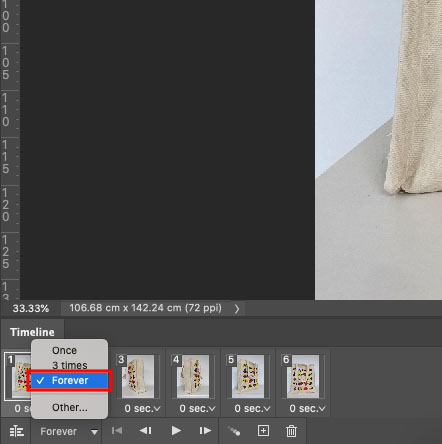
Click the repeat menu from the bottom of the Timeline panel and select ‘Forever’ to loop your animation.
Step 5: Exporting the animation as a GIF
Now you have made your animation, its time to export this as a GIF!
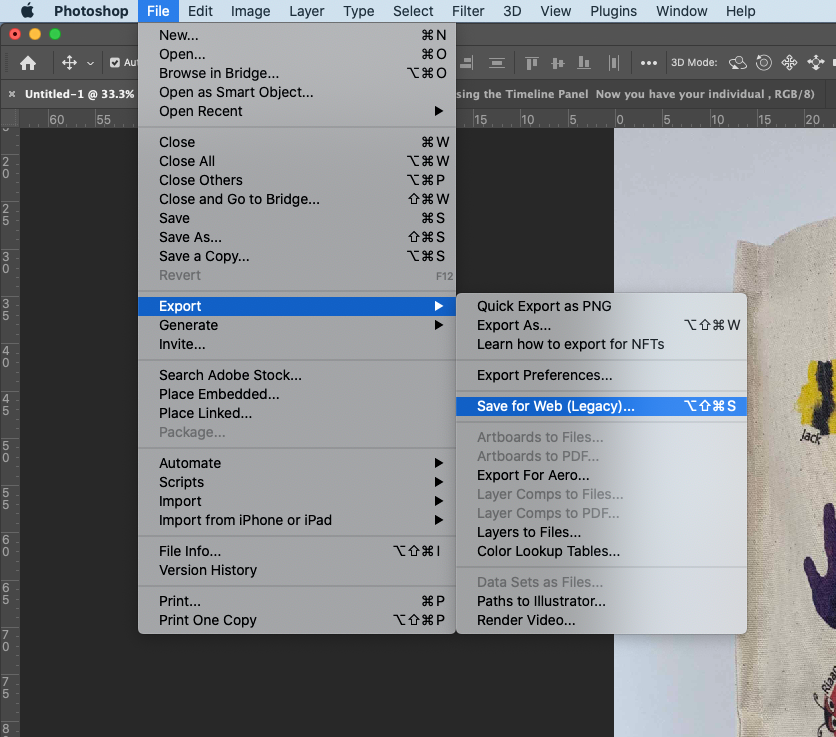
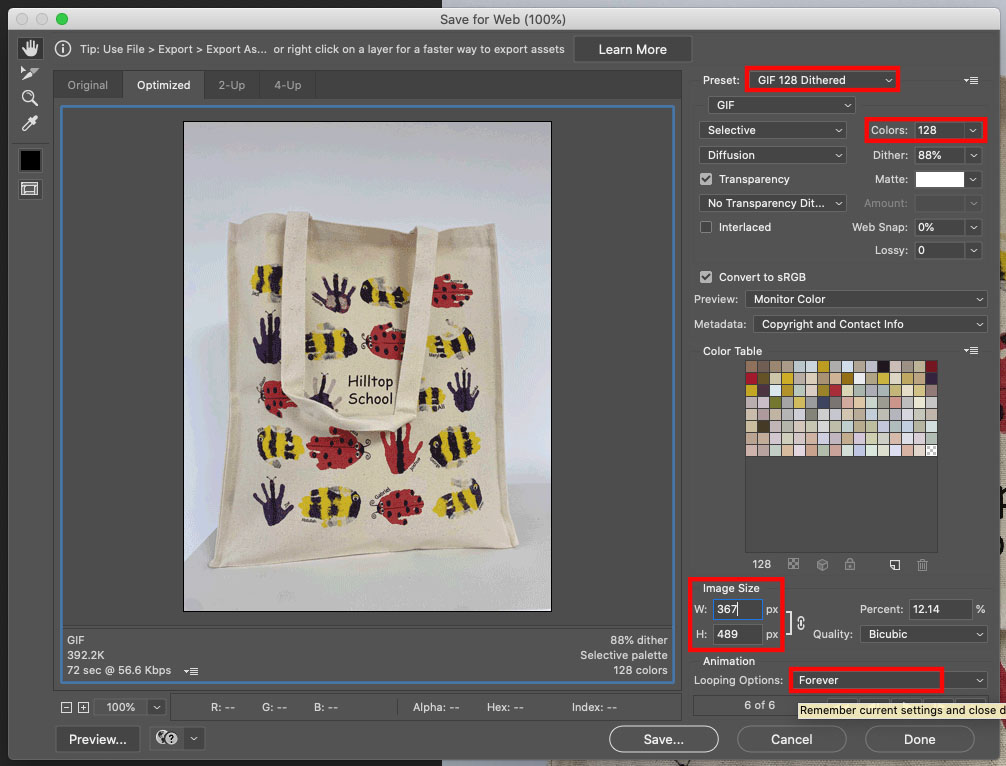
Go to File > Export > Save for Web (Legacy) Select ‘GIF 128 Dithered’ from the preset menu. Select ‘256’ from the colours menu.
To use the GIF online you may want to change the file size of the animation, you can change this in the ‘Image Size’ options by changing the Width and Height. For reference I have changed my animation to 725 wide & 489 high.
Select ‘Forever’ from the Looping Options menu. Click the ‘Preview’ button in the bottom left corner to preview your GIF in a web browser to check the file size and quality.
Finally click ‘Save’ and select a destination for your GIF file.

And thats it.... you have an animated GIF ready to be shared wherever you please!


